Element Editor
The Animation Element Editor is the editor used to visually select objects on the SVG screen and bind animation behaviors to the selected objects. SCADA screens are quickly created through a visual configuration interface without writing code.
Accessing the Editor
Section titled “Accessing the Editor”Menu: Development → Animations → Animation Dev → Element Editor button in the upper right corner
The editor opens as a panel next to the SVG screen.
Workflow
Section titled “Workflow”Step 1: Selecting an Object on the SVG
Section titled “Step 1: Selecting an Object on the SVG”You select an object by clicking with the mouse on the SVG open in the Animation Dev screen. The selected object is visually highlighted.
Accessing Objects Inside Groups
Section titled “Accessing Objects Inside Groups”Objects in SVG are usually grouped within <g> (group) elements. The default click selects the top-level group.
To access an object inside a group:
- Press and release the Ctrl key once
- Now when you click with the mouse, the object you directly clicked on is selected instead of the group
- This allows you to target inner objects like text, rect, circle within a group
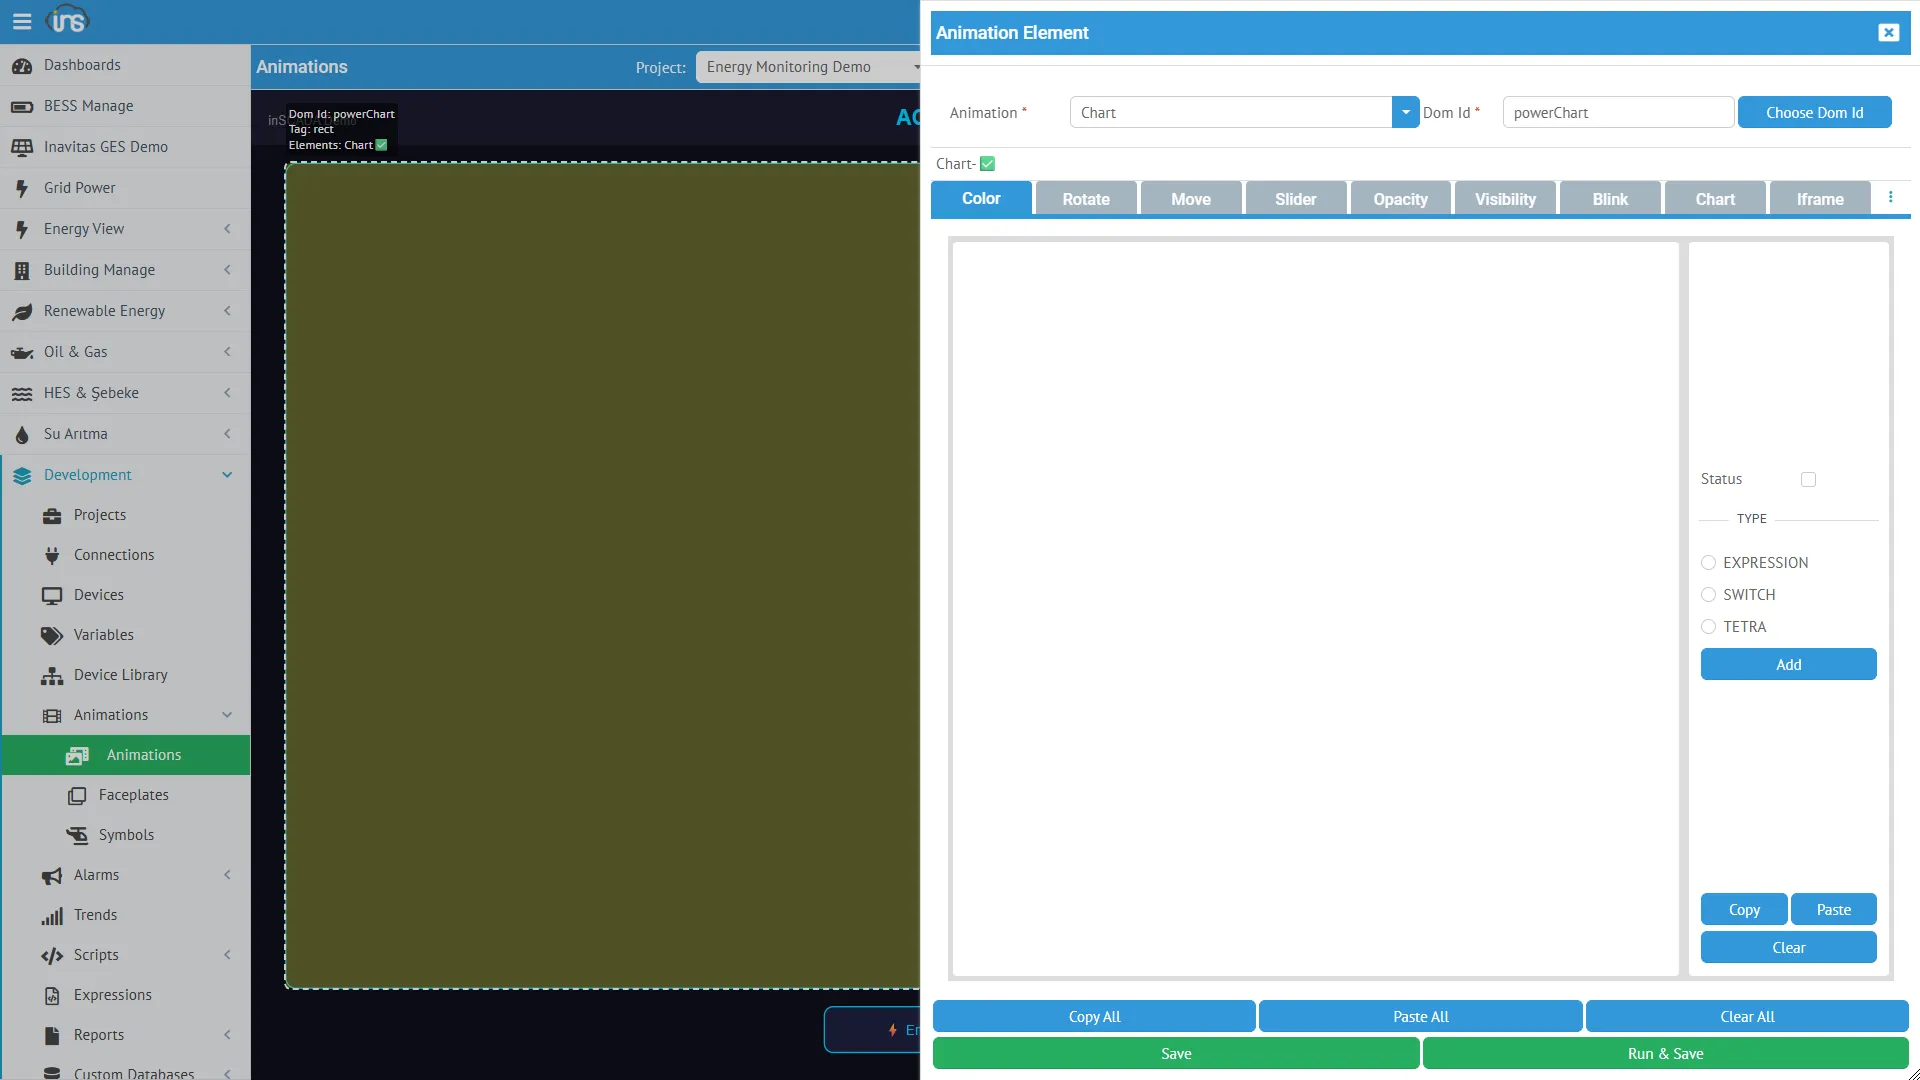
Step 2: Opening the Element Editor
Section titled “Step 2: Opening the Element Editor”Click the Element Editor button while an object is selected. When the editor opens:
- The selected object’s DOM ID is automatically retrieved
- Based on the object’s SVG tag type (text, rect, g, image, circle, path…), the applicable animation types are automatically filtered
- Appropriate animation types are displayed as tabs ready for configuration
Available Animation Types by SVG Tag Type
Section titled “Available Animation Types by SVG Tag Type”| SVG Tag | Available Types |
|---|---|
| text / tspan | Get, Color, Opacity, Visibility, Rotate, Move, Scale, Bar, Pipe, Blink, Tooltip, AlarmIndication, Click |
| rect / circle / ellipse / polygon | In addition to the above: Chart, Iframe, Datatable, Slider, Input, QRCode, GetSymbol, Faceplate, Peity, Menu, Button, Image |
| g (group) | Animate, Faceplate, Iframe, Rotate, Move, Scale, Opacity, Visibility |
| image | Faceplate, Iframe, Image |
Step 3: Selecting and Configuring an Animation Type
Section titled “Step 3: Selecting and Configuring an Animation Type”Select the desired animation type from the tabs. Each animation type has its own visual configuration interface:
Visual Configuration Without Writing Code
Section titled “Visual Configuration Without Writing Code”Each animation type comes with form fields appropriate to its type. The developer configures by filling in these form fields without writing code:
| Animation Type | Configuration Interface |
|---|---|
| Get | Variable selector, format setting, unit |
| Color | Color palette, condition table (value → color mapping) |
| Rotate | Rotation center (cx, cy), min/max angle, min/max value |
| Bar | Direction (horizontal/vertical), min/max value, fill color |
| Move | Axis (X/Y), distance range, min/max value |
| Slider | Min, max, step, direction, color |
| Chart | Chart type, colors, axis settings, data source |
| Opacity | Min/max opacity, min/max value |
| Visibility | Condition (Boolean or threshold) |
| Blink | Blink speed, colors |
| Set | Target variable, value to write |
| Input | Type (text/number), min, max, placeholder |
| Iframe | URL address |
| Open | Target animation selector |
| Faceplate | Faceplate selector, placeholder values |
| Datatable | Column definitions, data source |
| AlarmIndication | Alarm group selector |
Step 4: Expression (Advanced — Optional)
Section titled “Step 4: Expression (Advanced — Optional)”Each animation type has an Expression section. This section is optional — you don’t need to use it if the visual configuration is sufficient.
Expression allows the developer to program the animation behavior in a completely freeform manner:
Expression Types
Section titled “Expression Types”| Type | Description | When to Use |
|---|---|---|
| Tag | Variable name reference | Simplest — directly binding a variable |
| Expression | JavaScript code | Calculation, formatting, conditional logic |
| Switch | Value → result table | State-based multiple matching |
| Numeric | Constant number | For testing purposes |
| Text | Constant text | Label, heading |
| Collection | Multiple variables | For Chart, Datatable |
| Alarm | Alarm reference | For AlarmIndication |
| Faceplate | Faceplate reference | Faceplate placement |
| Animation | Animation reference | Screen navigation (Open) |
| Animation Popup | Popup reference | Open modal screen |
| Custom Menu | Menu reference | Open menu |
| Url | URL | Iframe embedding |
| Tetra Color | 4-color alarm status | Alarm color codes |
| Button | Button configuration | Button type |
| Html | HTML content | Rich content |
| System Page | System page | Platform internal page |
| InSCADA View | Platform view | Internal view |
Expression Examples
Section titled “Expression Examples”Tag — Simply write the variable name:
ActivePower_kWExpression — Free calculation with JavaScript:
// Formatted valuevar val = ins.getVariableValue("ActivePower_kW");return val.value.toFixed(1) + " kW";// Conditional colorvar temp = ins.getVariableValue("Temperature_C").value;if (temp > 80) return "#ff0000";if (temp > 60) return "#ff8800";return "#00cc00";// Calculation from two variablesvar power = ins.getVariableValue("ActivePower_kW").value;var voltage = ins.getVariableValue("Voltage_V").value;if (voltage > 0) return (power * 1000 / voltage).toFixed(1);return "0";Switch — Value → result matching table:
0 → Stopped1 → Running2 → Fault3 → MaintenanceColor switch:
true → #00cc00false → #ff0000Step 5: Saving
Section titled “Step 5: Saving”| Button | Function |
|---|---|
| Save | Saves the animation element. The binding is attached to the object |
| Run & Save | First tests the expression on the server, saves if the result is successful |
Run & Save is especially useful when developing expressions — you verify the result before saving.
After saving, the binding automatically becomes active when the animation is run in Visualization mode.
Runtime Architecture
Section titled “Runtime Architecture”The bindings configured in the Element Editor work as follows in the Visualization screen:
WebSocket-Based Real-Time Update
Section titled “WebSocket-Based Real-Time Update”┌─────────────┐ ┌──────────┐ ┌─────────┐│ Browser │──eval-animation──▶│ Server │◀── Variable ────│ Cache ││ (SVG DOM) │◀─anim-results────│ (Engine) │ Values │ │└──────┬──────┘ └──────────┘ └─────────┘ │ ▼ For each element type-appropriate DOM update- Visualization opens → Animation elements are loaded, WebSocket subscription is established
- Every
durationms → Browser sends aneval-animationmessage - Server → Runs all element expressions, reads variable values from cache
- Result returns → Calculated value for each element ID
- DOM is updated → Appropriate DOM operation is applied based on each element type
DOM Update Table
Section titled “DOM Update Table”| Animation Type | DOM Operation |
|---|---|
| Get | element.textContent = value |
| Color | element.style.fill = color |
| Opacity | element.style.opacity = value |
| Visibility | element.style.display = value ? '' : 'none' |
| Rotate | transform: rotate(angle) |
| Move | transform: translate(x, y) |
| Bar | element.height = value or element.width = value |
| Scale | transform: scale(value) |
| Blink | SVG <animate> element add/remove |
| Pipe | stroke-dashoffset animation |
Control Elements (Set, Slider, Input, Click)
Section titled “Control Elements (Set, Slider, Input, Click)”Control types are not included in periodic evaluation. They are triggered on user interaction:
User Click → Run Expression → ins.setVariableValue() → Cache → Field DevicePerformance
Section titled “Performance”- All elements are evaluated in bulk in a single WebSocket message
- Variable values are read from cache (no database access, < 1ms)
- Only active elements (
status: true) are evaluated - Event-based elements like Click, MouseDown are excluded from the periodic cycle
- Timeout: if no response arrives within
duration × 10ms, a retry is attempted