Animation Configuration
This page explains the configuration panel, toolbar tools, and script settings of an animation.
Configuration Panel
Section titled “Configuration Panel”You can open the configuration panel by clicking the pencil icon on the Animation Dev screen:
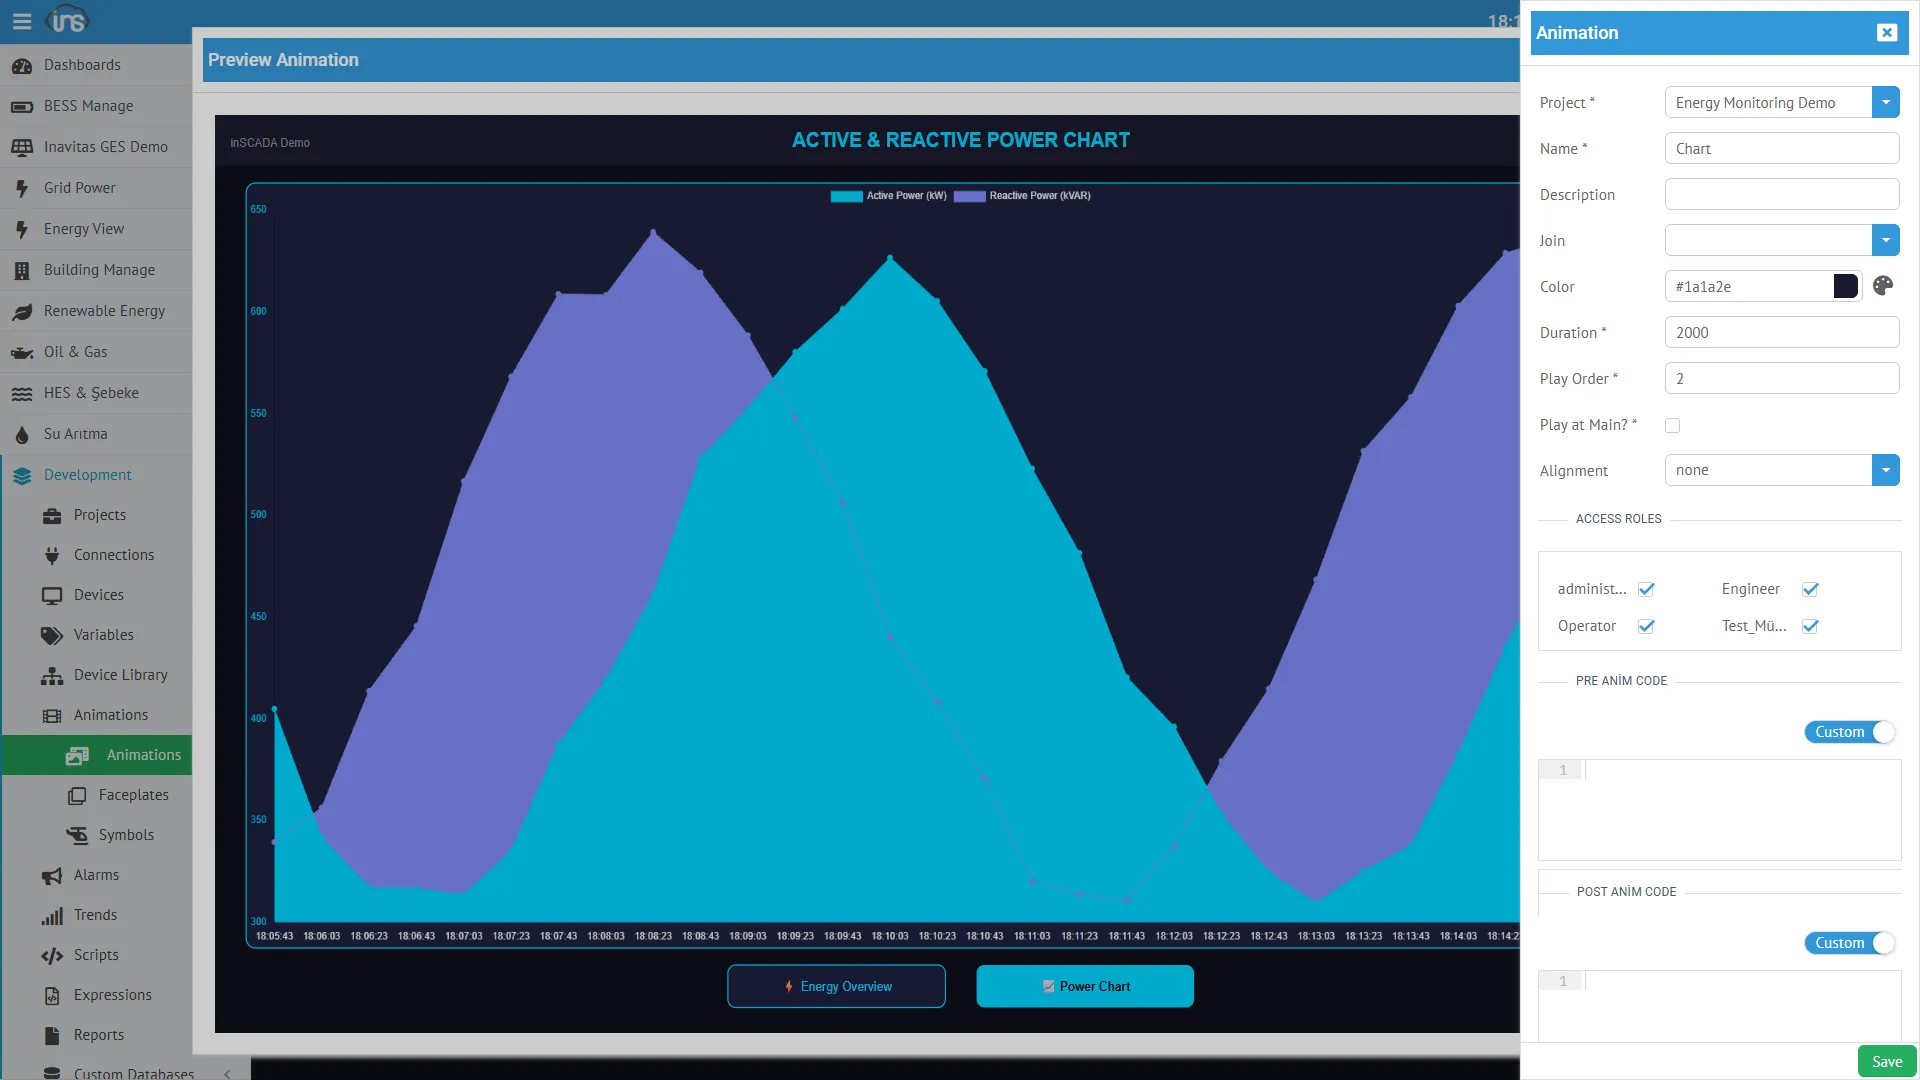
Basic Settings
Section titled “Basic Settings”| Field | Required | Description |
|---|---|---|
| Name | Yes | Screen name (unique within the project) |
| Description | No | Description |
| Duration | Yes | Wait time after scan (ms, min: 100). Details below |
| Play Order | Yes | Ordering number in the Visualization screen |
| Main | Yes | Should it appear in the Visualization menu |
| Color | No | Screen background color. Default: #00DDDC |
| Alignment | No | SVG screen alignment mode |
| Join | No | Animation to attach as a background layer (overlay transparency concept) |
Duration (Wait Time)
Section titled “Duration (Wait Time)”Duration is the wait time between two scans — not the scan period:
Total Cycle = Scan Time + Duration (wait)- The server runs all element expressions → scan time
- After the scan completes, it waits for
durationms - A new scan begins
Main and Play Order
Section titled “Main and Play Order”The Runtime → Visualization menu lists the animations marked as Main in the project. The page navigation buttons at the bottom are arranged from left to right according to Play Order.
Visualization Screen┌──────────────────────────────────────────────────┐│ ││ [ Active Animation Content ] ││ │├──────────────────────────────────────────────────┤│ ⚡ Energy Overview │ 📈 Power Chart │ ... │ ← Play Order sequence└──────────────────────────────────────────────────┘- Main = true → Visible in the Visualization menu
- Main = false → Accessible only in Development (for sub-screens opened via Open, popups)
- Play Order = 1 → Leftmost, 2 → next, …
Color (Background Color)
Section titled “Color (Background Color)”The animation’s background color is set from this field.
Alignment
Section titled “Alignment”Determines the position of the SVG content on the screen:
| Value | Position |
|---|---|
| top-left | Top left |
| top-mid | Top center |
| top-right | Top right |
| mid-left | Middle left |
| mid-mid | Center (default) |
| mid-right | Middle right |
| bottom-left | Bottom left |
| bottom-mid | Bottom center |
| bottom-right | Bottom right |
| none | No alignment |
Join (Layer Merging)
Section titled “Join (Layer Merging)”Join works with an overlay transparency concept — it attaches an animation as a fixed background layer behind another animation. The animation attached via Join always remains visible behind the main animation.
This allows you to design common elements that repeat on every page (top bar, bottom bar, alarm banner, navigation menu, logo, clock, status indicators) in a single animation and attach it as a layer to all pages.
┌──────────────────────────────────────────┐│ ▸ Top Bar: Logo, Clock, Alarm Counter │ ← Join Animation (background layer)├──────────────────────────────────────────┤│ ││ [ Main Animation Content ] │ ← Main Animation (foreground layer)│ Page-specific changing content ││ │├──────────────────────────────────────────┤│ ▸ Bottom Bar: Navigation Buttons │ ← Join Animation (background layer)└──────────────────────────────────────────┘Usage Scenario
Section titled “Usage Scenario”-
Create a “Common_Layout” animation (Main = false):
- Top section: Company logo, date/time, active alarm counter
- Bottom section: Page navigation buttons, connection status indicator
- This animation is not visible standalone in Visualization
-
Select “Common_Layout” from the Join field in each page animation:
- “Energy Overview” → Join: Common_Layout
- “Motor Detail” → Join: Common_Layout
- “Alarm Panel” → Join: Common_Layout
-
Result: When all pages are opened, Common_Layout stays fixed in the background layer, while the page content changes in the foreground. You only need to update the common elements in one place.
Using Join and Alignment Together
Section titled “Using Join and Alignment Together”The Alignment setting of the Join animation determines the position of the background layer on the screen. The Alignment setting of the main animation determines the position of the foreground layer. Together they compose the screen layout.
Access Roles
Section titled “Access Roles”At the bottom of the configuration panel, there is an Access Roles section. This section lists all roles defined in the platform as checkboxes.
The selected roles determine who can access this animation at runtime:
- Only users with the checked roles can see this animation in Visualization
- If no roles are selected or all are selected, all users can access it
- This allows showing different screens to different user groups within the same project
Examples:
- “Overview” screen → all roles can access
- “Control Panel” screen → only “Engineer” and “Administrator” roles
- “Management Report” screen → only “Administrator” role
Pre/Post Animation Scripts
Section titled “Pre/Post Animation Scripts”Two types of scripts can be attached to an animation:
Pre-Animation Code
Section titled “Pre-Animation Code”Runs before element expressions in every scan cycle. Can be defined in two ways:
1. Inline Code (Custom Code)
JavaScript code is written directly:
if (__firstScan) { // Load historical data on first load var end = ins.now(); var start = ins.getDate(end.getTime() - 3600000); var logs = ins.getLoggedVariableValuesByPage( ['ActivePower_kW'], start, end, 0, 100 );}2. Script Selection (Function Library)
A selection is made from scripts defined in the project. The contents of the selected scripts are added to the animation, and functions defined in the script become callable from animation element expressions.
This mechanism allows using scripts as a function library:
// Script: "ChartHelpers" (Schedule Type: None)// This script does not run independently, it is added to the animation as a library
function buildChartData(varName, hours) {    var end = ins.now();    var start = ins.getDate(end.getTime() - hours * 3600000);    var logs = ins.getLoggedVariableValuesByPage(        [varName], start, end, 0, 100    );    var labels = [];    var values = [];    for (var i = logs.length - 1; i >= 0; i--) {        labels.push(logs[i].dttm);        values.push(logs[i].value);    }    return { labels: labels, values: values };}
function formatValue(val, decimals, unit) {    return val.toFixed(decimals) + " " + unit;}
When this script is attached to an animation, it can be called from any element expression as follows:
// Inside element expression — call the library functionvar data = buildChartData("ActivePower_kW", 1);return data;// In another element expressionvar power = ins.getVariableValue("ActivePower_kW").value;return formatValue(power, 1, "kW");Important Rules
Section titled “Important Rules”| Situation | Behavior |
|---|---|
| Function defined but not called in the script | Function does not run, it is only added as a definition to the animation. It waits to be called from element expressions |
| Function defined and called in the script | Function runs automatically every scan cycle (background task) |
| Script’s Schedule Type | Set to None — otherwise the script runs both in the animation cycle and independently on its own schedule (Periodic/Daily) in the background, which is unnecessary resource consumption |
Post-Animation Code
Section titled “Post-Animation Code”Runs after element expressions in every scan cycle. Defined in the same way with inline code or script selection.
Execution Order
Section titled “Execution Order”Each cycle:1. Pre-Animation Code2. Animation Elements (all bindings)3. Post-Animation Code ↓ duration ms wait ↑ repeat from beginningBuilt-in Variables
Section titled “Built-in Variables”Built-in variables available in scripts and element expressions:
| Variable | Type | Description |
|---|---|---|
__firstScan | Boolean | true in the first cycle, false afterwards |
__animName | String | Name of the running animation |
__parameters | String | Placeholder parameters |
Toolbar Tools
Section titled “Toolbar Tools”The toolbar icons in the upper right corner of the Animation Dev screen:
| Icon | Tool | Description |
|---|---|---|
| + (plus) | New Animation | Create a new animation |
| ✏️ (pencil) | Configuration | Edit animation settings (this page) |
| − (minus) | Delete | Delete the animation |
| ✨ (magic wand) | Element Editor | Create animation binding on SVG object |
| 🚀 (rocket) | Preview | Live preview the animation |
| ⬆ (upload) | Upload SVG | Upload an SVG file |
| ⬇ (download) | Download SVG | Download the current SVG |
| + (circle) | Placeholder | Manage animation parameters |
Three-Dot Menu (⋮)
Section titled “Three-Dot Menu (⋮)”| Tool | Description |
|---|---|
| Clone | Copy the animation |
| Show Scripts | Show attached scripts |
| Generate Link | Create a shareable link |
| Backup | Export the animation |
| Restore | Import an animation |
Placeholder (Parametric Screen)
Section titled “Placeholder (Parametric Screen)”Parameters can be defined for an animation using the Placeholder button in the toolbar. These parameters allow the same SVG design to be reused with different values.
Usage: Design a “Motor Detail” screen, define {motor_id} and {motor_name} placeholders. When opened with different parameters via the Open animation type, it shows a different motor each time.
Placeholder values can be read in scripts using the __parameters variable.